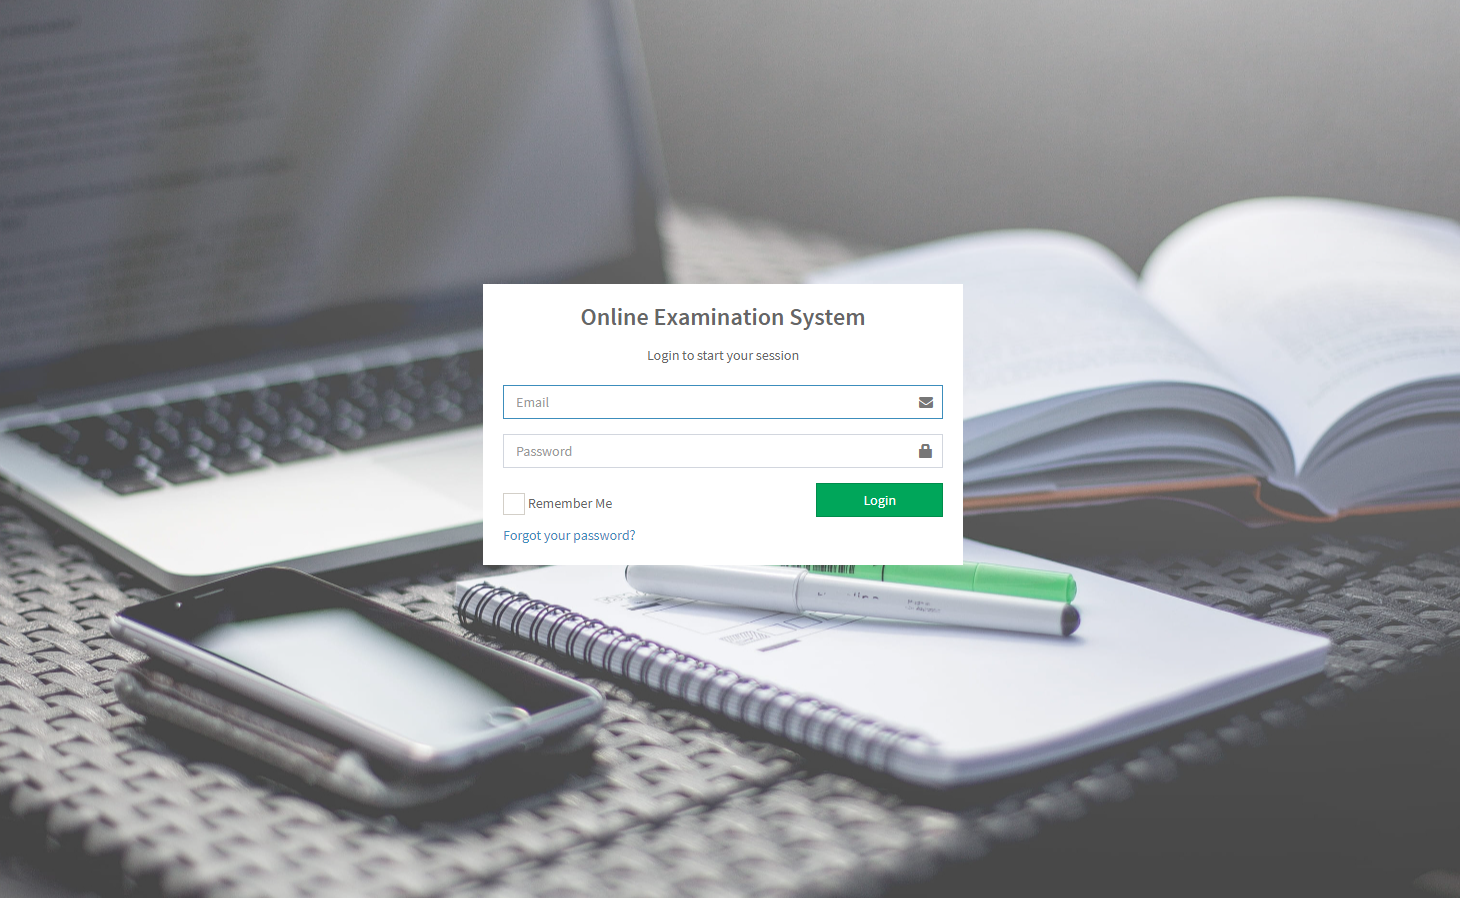
Online Exam System in PHP using CodeIgniter Free Source Code
Introduction
This simple project is an Online Examination System, a web-based application developed using PHP, CodeIgniter, and the MySQL Database. The PHP CodeIgniter Project offers an Online Examination platform for students in specific colleges or universities. This web application provides an effortless and efficient method for creating and conducting examinations. It encompasses multiple pertinent features and functionalities for both students and lecturers or faculties. The system boasts a pleasant user interface achieved through the utilization of Bootstrap Framework, AdminLTE Template, and other libraries, ensuring an enhanced user experience. Additionally, it incorporates user-friendly features and functionalities.
| Project Name | Online Exam System in PHP using CodeIgniter Free Source Code |
|---|---|
| Language Used | PHP5.6, PHP7.x,PHP8.x |
| Database | MySQL 5.x,MySQL 8.x |
| User Interface Design | HTML, AJAX,JQUERY,JAVASCRIPT |
| Web Browser | Mozilla, Google Chrome, IE8, OPERA |
| Software | XAMPP / Wamp / Mamp/ Lamp (anyone) |
About the Online Examination System
This Online Examination System Project has been developed with the following:
- XAMPP v3.3.0
- PHP
- CodeIgniter
- MySQL Database
- HTML
- CSS
- JavaScript
- Ajax
- jQuery
- Bootstrap
- Font Awesome
- AdminLTE
- DataTables
The Online Examination System Project in PHP Codeigniter requires valid and registered users to gain access to the system’s features and functionalities. This application has three different user roles: Administrator, Lecturer/Faculty, and Student. Each of these roles comes with distinct restrictions and permissions.
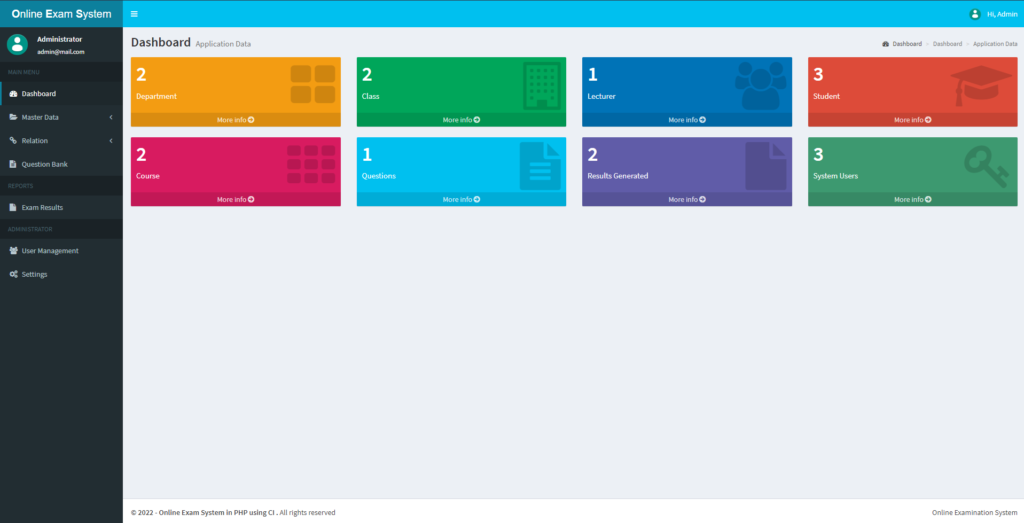
The Administrator User holds the privilege of accessing and managing all administrative or managerial features and functionalities. They can also manage the list of system users. Administrators are responsible for adding information about faculty and students to the system. They are also the ones who can grant user access to both Lecturers and Students. Additionally, they have the privilege to access Exam Results, Add Questions for Lecturers, and Clear all data in the database.
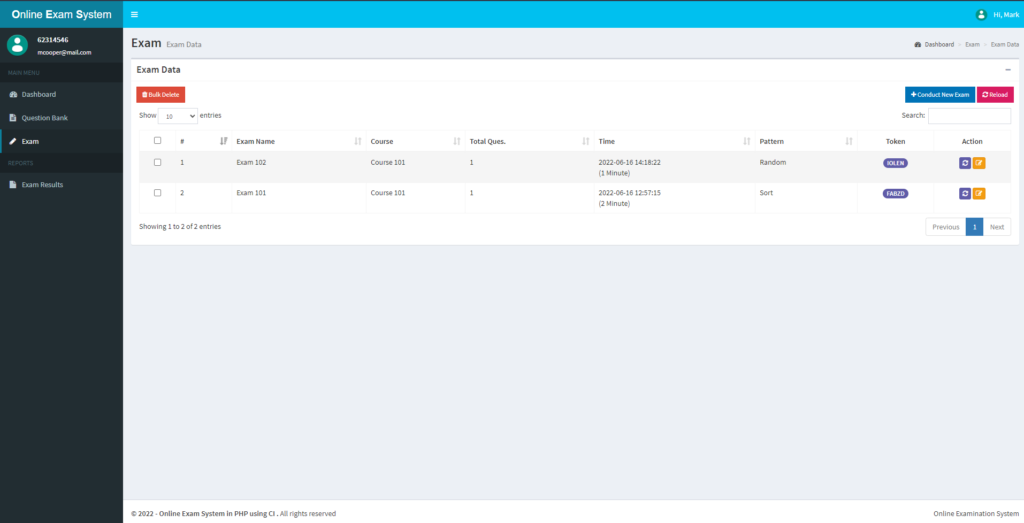
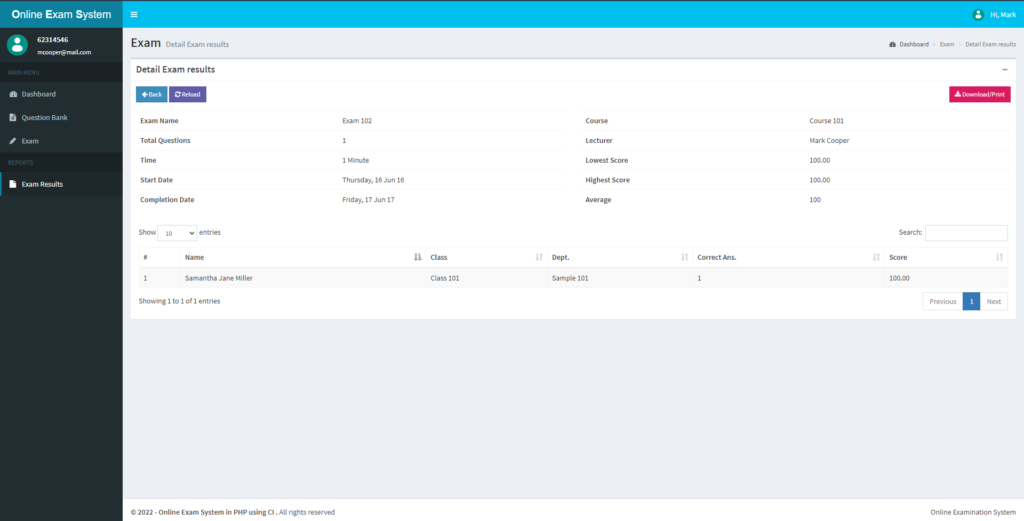
The Lecturer or Faculty member has limited access to features and functionalities. They can add questions for the classes or courses they are handling. Lecturers have the privilege to create or conduct exam sets. They can create a new exam with relevant information such as the Exam Title and Schedule. Faculty members can also view and print Exam Results per Exam Set. They have access to view student result information for each exam set.
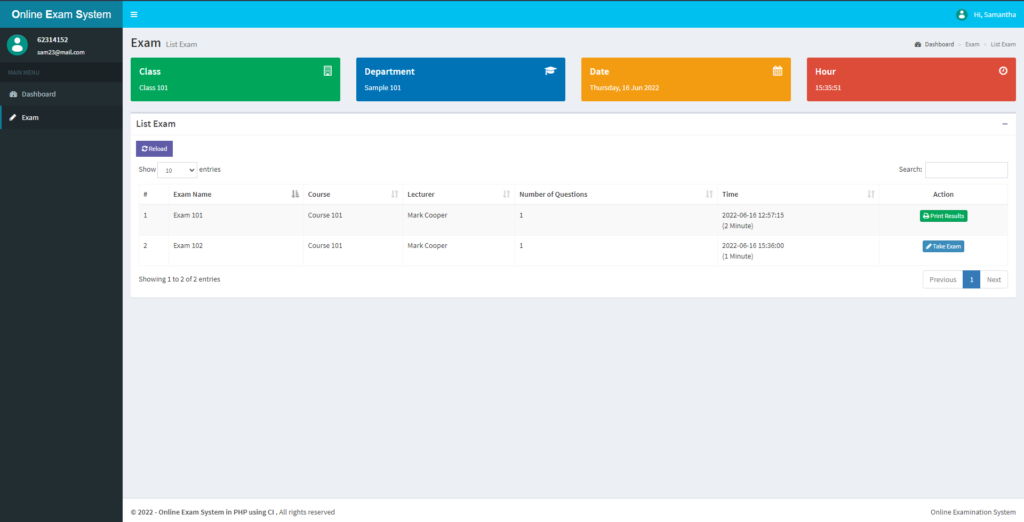
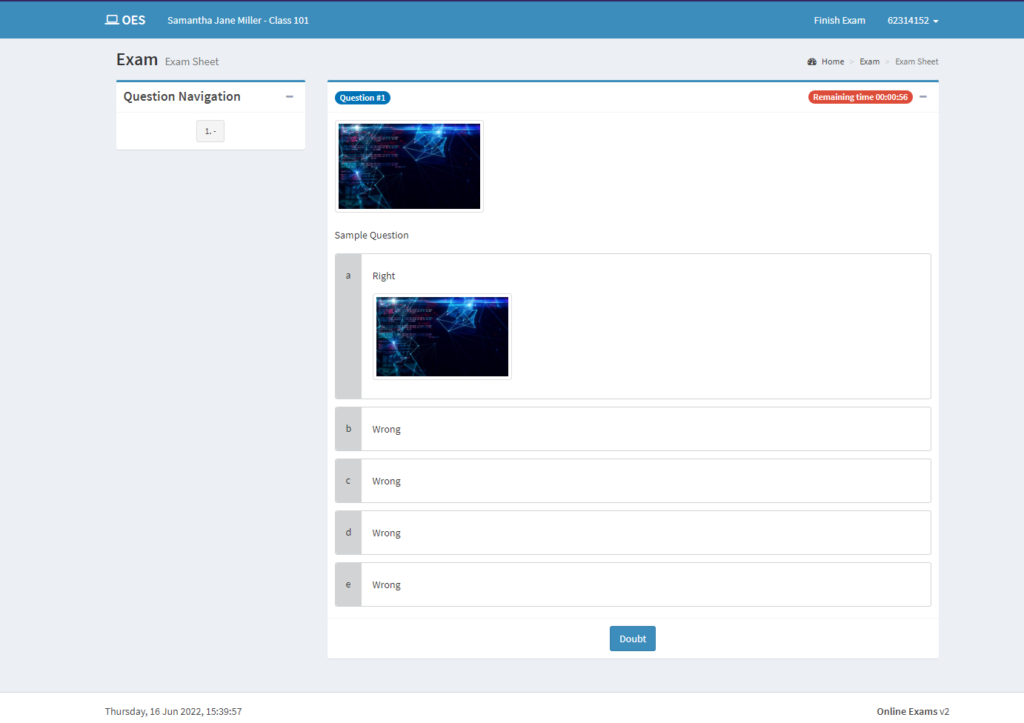
The Student user has the fewest features and functionalities within the system. Student users’ primary purpose for accessing the system is to take exams created by their faculties or lecturers. They can only take the examination if it is still available and only once. Each exam set has a timer set by the Lecturer, which only allows them to finish the exam within a certain time duration. If the countdown or timer reaches zero and the student has not finished taking the exam, the system will automatically submit the student’s completed answers.
Features
Administrator
- Dashboard Page
- Display the summary of the list.
- Department Management
- Add New Multiple Department
- List All Departments
- Edit/Update Department Details
- Bulk Deletion of Department
- Import Department
- Print Department
- Export Department
- Copy Department
- Class Management
- Add New Multiple Class
- List All Class
- Edit/Update Class Details
- Bulk Deletion of Class
- Import Class
- Print Class
- Export Class
- Copy Class
- Course Management
- Add New Multiple Course
- List All Courses
- Edit/Update Course Details
- Bulk Deletion of Course
- Import Course
- Print Course
- Export Course
- Copy Course
- Lecturer Management
- Add New Lecturer
- List All Lecturers
- Edit/Update Lecturer Details
- Bulk Deletion of Lecturer
- Generate Lecturer System Credential
- Import Lecturer
- Print Lecturer
- Export Lecturer
- Copy Lecturer
- Student Management
- Add New Student
- List All Students
- Edit/Update Student Details
- Bulk Deletion of Student
- Generate Student System Credential
- Import Student
- Print Student
- Export Student
- Copy Student
- Relation Management
- Setting Multiple Class for Lecturers
- Setting Multiple Departments for Class
- Question Management
- Add New Question
- List All Questions
- Edit/Update Question Details
- Delete Question
- View Question Details
- Add File Per Question
- Add File Per Question Option
- Reports
- List All Exams
- View Exam Results
- Print or Download Exam Result
- User Management
- List All Users
- Edit/Update User Details
- Delete User
- Import User
- Print User
- Export User
- Copy User
- Update Account Details/Credentials
- Clear All Data in the Database (except the admin user)
- Login and Logout
Lecturer or Faculty
- Login
- Add New Exam Set
- List All Exam Set
- Edit Exam Set
- Delete Exam Set
- Re-generate Exam token
- View Exam Result
- Download or Print Exam Result
- Update System Account Credential
- Logout
Students
- Login
- List All Exam Set
- Take Exam
- Mark Question as Doubt for Reviewing Before Submit
- View Exam Result
- Exam Timer
- Exam Countdown
- Update System Account Credential
- Logout
The source code was developed only for educational purposes only. You can download the source code for free and modify it the way you wanted.
System Snapshots of some Features
How to Run?
Requirements
- Download and Install any local web server such as XAMPP.
- Download the provided source code zip file. (download button is located below)
System Installation/Setup
- Open your XAMPP Control Panel and start Apache and MySQL.
- Extract the downloaded source code zip file.
- Copy the extracted source code folder and paste it into the XAMPP’s “htdocs” directory.
- Browse the PHPMyAdmin in a browser. i.e. http://localhost/phpmyadmin
- Create a new database naming exam_db.
- Import the provided SQL file. The file is known as exam_db.sql located inside the database folder.
- Browse the Online Examination System in a browser. i.e. http://localhost/ci_exam/.
Admin Default Access:
Email: admin@mail.com
Password: admin123
That’s it. You can now explore the features and functionalities of this Online Examination System in PHP using CodeIgniter Framework. I hope this will help you with what you are looking for and you’ll find something useful for your future projects.
Enjoy 🙂
Note: Due to the size or complexity of this submission, the author has submitted it as a .zip file to shorten your download time. After downloading it, you will need a program like Winzip to decompress it.
Virus note: All files are scanned once-a-day by apilogin.in for viruses, but new viruses come out every day, so no prevention program can catch 100% of them.
FOR YOUR OWN SAFETY, PLEASE:
1. Re-scan downloaded files using your personal virus checker before using it.
2. NEVER, EVER run compiled files (.exe’s, .ocx’s, .dll’s etc.)–only run source code.
Simple Customer Relationship Management (CRM) System using PHP Free Source Code
Simple Customer Relationship Management (CRM) System using PHP Free Source Code
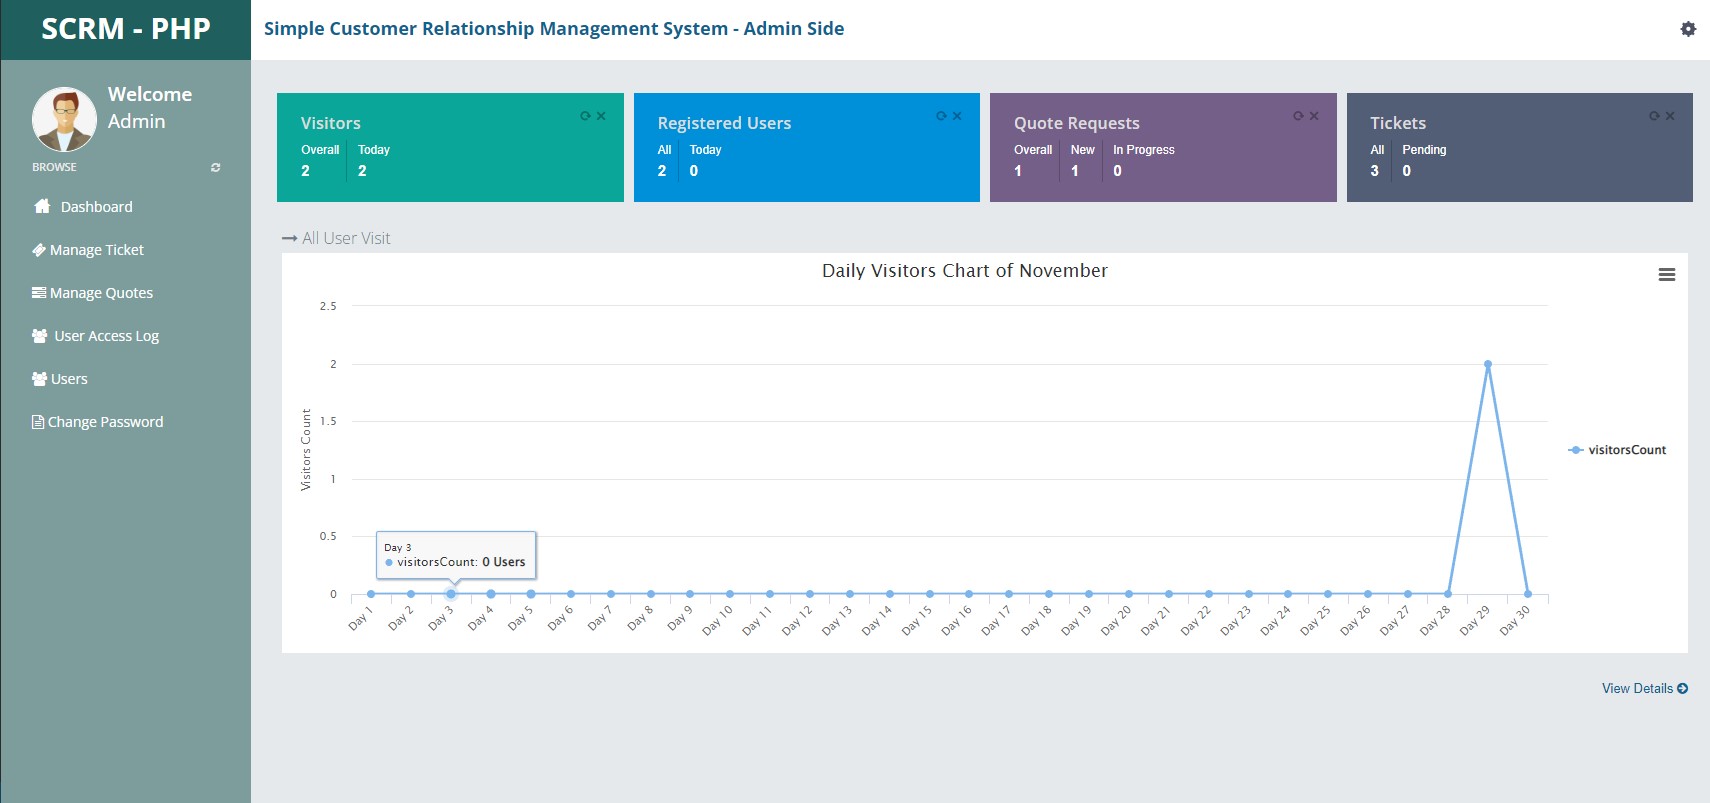
This project is entitled Simple Customer Relationship Management (CRM) System. It is a web-based application that was developed using PHP and MySQL Database. It provides certain business customers with an online platform where they can submit quotation requests and issue tickets. It has a pleasant user interface using the Bootstrap Framework. This project is consist of user-friendly features and functionalities.
How does the Simple Customer Relationship Management (CRM) System work?
This Simple Customer Relationship Management (CRM) System can be accessed by 2 different user roles which are the Administrator and the Customers. The Administrator can access the admin panel of the system while the Customer has access to the customer side of the application.
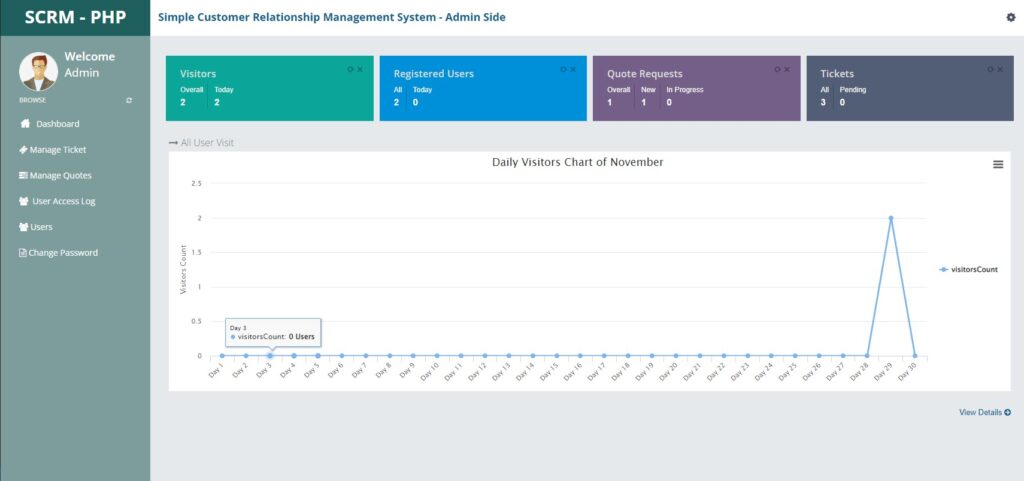
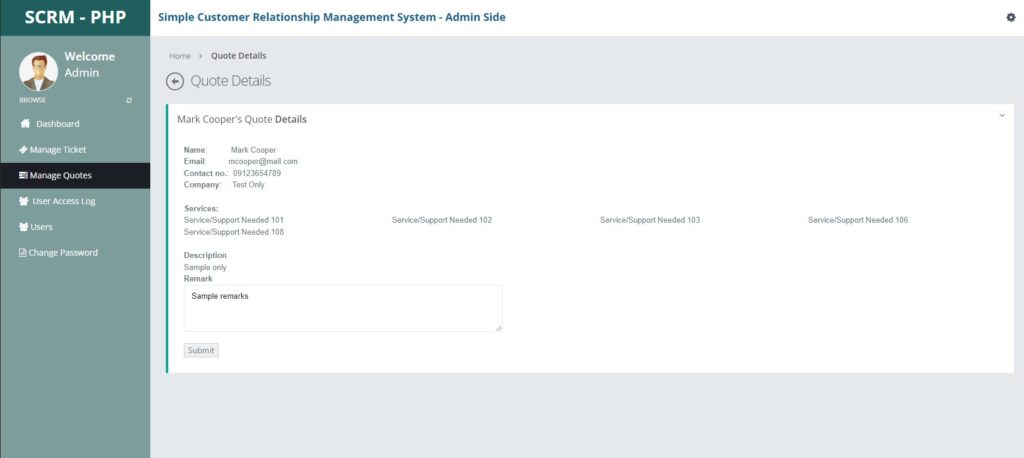
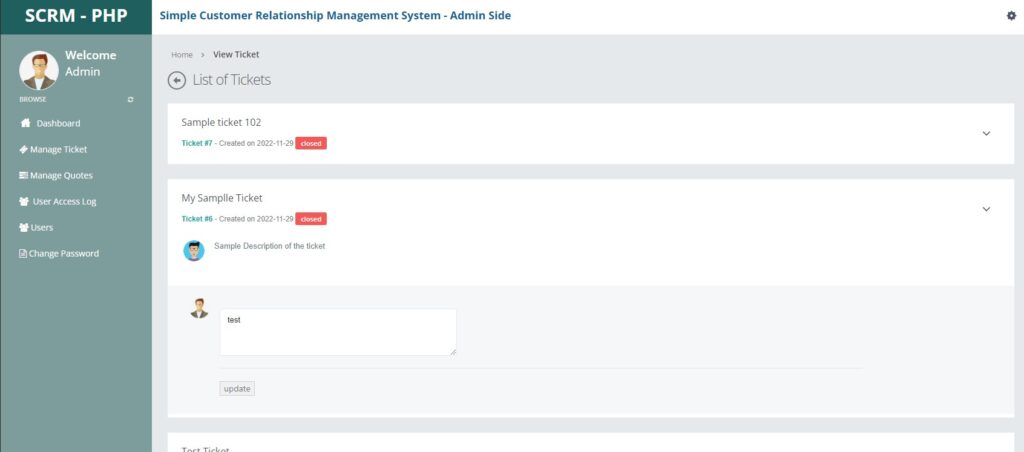
The Administrator user is the one who is in charge of managing the important data on the system. This side of the system requires the Admin User to log in with his/her valid system credentials in order to access and manage the system on the admin side. Here, the administrator is able to read and manage the quotation requests of the customers and the same as well on the created or issued tickets of the customers. Aside from that, the admin can also list the registered customers’ accounts.
The Customers are required to signup and log in to the system in order to gain access to the different features and functionalities on the Customer Side. They submit quotation requests and tickets. The customer can only access and manage the list of quotation requests and tickets that he or she submitted.
| Project Name | Simple Customer Relationship Management (CRM) System using PHP Free Source Code |
|---|---|
| Language Used | PHP5.6, PHP7.x,PHP8.x |
| Database | MySQL 5.x,MySQL 8.x |
| User Interface Design | HTML, AJAX,JQUERY,JAVASCRIPT |
| Web Browser | Mozilla, Google Chrome, IE8, OPERA |
| Software | XAMPP / Wamp / Mamp/ Lamp (anyone) |
Features and Functionalities
Here are the different features and functionalities of the Simple Customer Relationship Management (CRM) System
Admin Site
- Login and Logout
- Dashboard
- Data Summary
- Visitors Graph
- List and Manage Tickets
- List and Manage Customers’ Quotation Requests
- List All Users’ Access Logs
- List and Manage Registered Users’ Accounts
- Update/Change Password
Customer Site
- Login and Registration
- Dashboard
- Create Quotation Request
- List Tickets
- Create Ticket
- View Ticket Details
- View and Manage Profile
- Update/Change Password
Technologies
Here is the list of Technologies to develop the Simple Customer Relationship Management (CRM) System:
- HTML
- CSS
- PHP
- MySQL Database
- Bootstrap Framework
- DataTables
- JavaScript
- jQuery Library
The Simple Customer Relationship Management (CRM) System Project source code zip file is provided on this website and is free to download. Feel Free to download the source code and modify it to meet your own requirements.
Snapshots
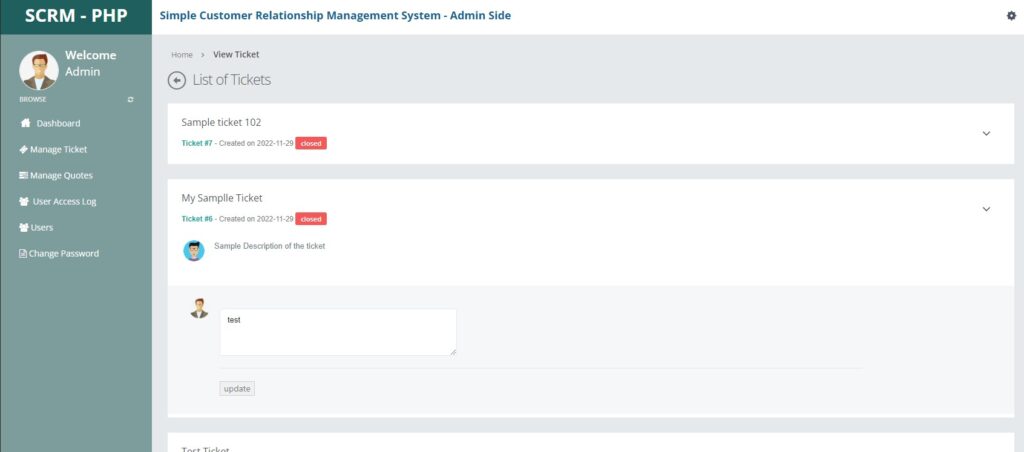
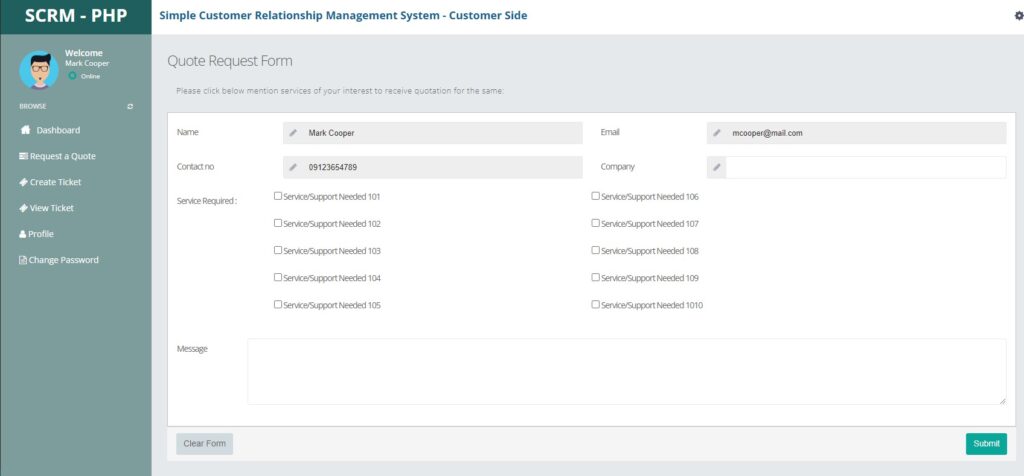
How to Run?
Requirements
- Download and Install any local web server such as XAMPP.
- Download the provided source code zip file. (download button is located below)
System Installation/Setup
- Open your XAMPP Control Panel and start Apache and MySQL.
- Extract the downloaded source code zip file.
- Copy the extracted source code folder and paste it into the XAMPP’s “htdocs” directory.
- Browse the PHPMyAdmin in a browser. i.e. http://localhost/phpmyadmin
- Create a new database named scrm_db.
- Import the provided SQL file. The file is known as scrm_db.sql located inside the database folder.
- Browse the Simple Customer Relationship Management (CRM) System in a browser. i.e. http://localhost/php-scrm/.
Admin Default Access:
Username: admin
Password: admin123
That’s it! I hope this Simple Customer Relationship Management (CRM) System Project in PHP and MySQL Database helps you with what you are looking for and that you’ll find something useful in the source code file itself.
Enjoy 🙂
Note: Due to the size or complexity of this submission, the author has submitted it as a .zip file to shorten your download time. After downloading it, you will need a program like Winzip to decompress it.
Virus note: All files are scanned once-a-day by apilogin.in for viruses, but new viruses come out every day, so no prevention program can catch 100% of them.
FOR YOUR OWN SAFETY, PLEASE:
1. Re-scan downloaded files using your personal virus checker before using it.
2. NEVER, EVER run compiled files (.exe’s, .ocx’s, .dll’s etc.)–only run source code.
Invoice System using PHP Free Source Code
Introduction
This is a PHP project that I’d developed called Invoice System. This is a simple OOP PHP project that can help some companies to manage their invoices. The system handles invoices for both selling products and services. This system can help other programmers especially those who are new to PHP language to learn some techniques and understand how to build an Invoice System in the said programming language.
About the Invoice System
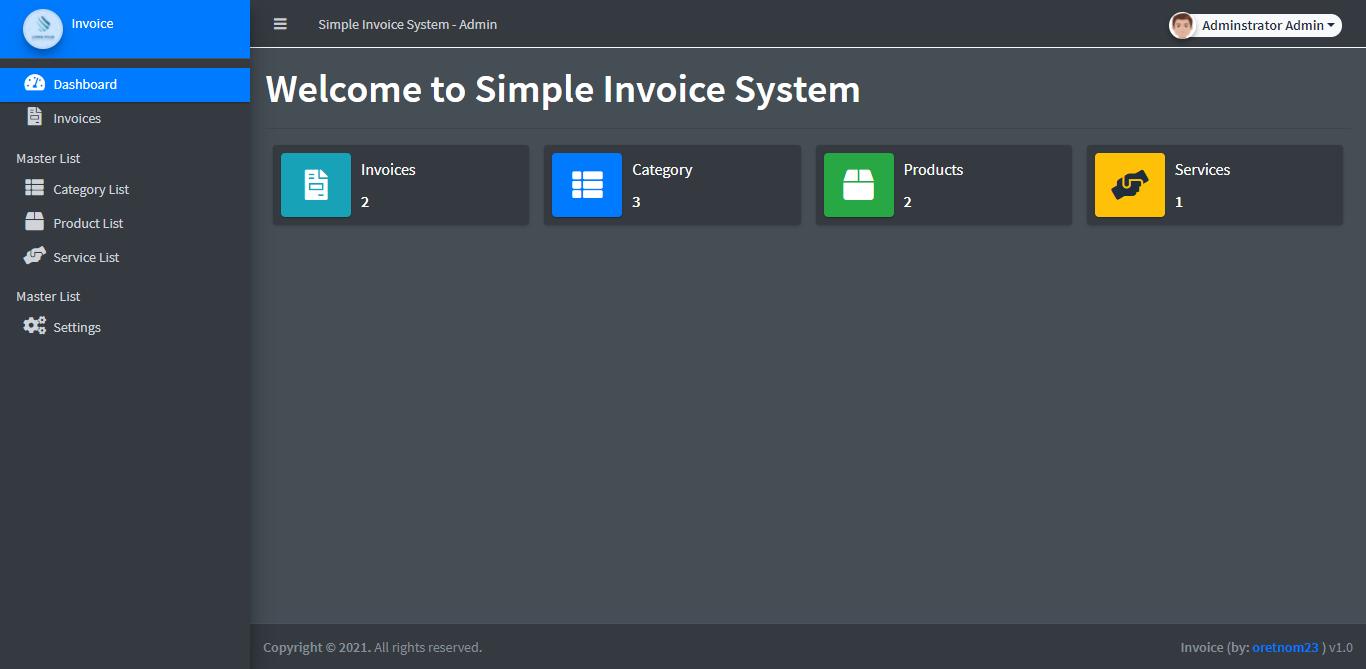
The Invoice System was developed using PHP/OOP, MySQL Database, HTML5, CSS, Javascript (jQuery and Ajax), and Bootstrap. The system stores the list of categories, products, services, and invoices. The invoices that will be store or generated in this system has 2 types which are the product invoice and service invoice. The system automatically generates a random invoice code but also editable and has a validation to check the code availability. After the invoice is saved, then a new window will pop up that contains the printable generated invoice. The dashboard displays the summary of the list stored inside the database. When listing the items of products or services in creating an invoice, the system has error trapping features to prevent human errors to result in system errors.
| Project Name | Invoice System using PHP Free Source Code |
|---|---|
| Language Used | PHP5.6, PHP7.x,PHP8.x |
| Database | MySQL 5.x,MySQL 8.x |
| User Interface Design | HTML, AJAX,JQUERY,JAVASCRIPT |
| Web Browser | Mozilla, Google Chrome, IE8, OPERA |
| Software | XAMPP / Wamp / Mamp/ Lamp (anyone) |
Features
- Secure Login
- Home Page/Dashboard
- Manage Category
- Manage Product
- Manage Service
- Create Invoice
- Update Invoice
- Print Invoice
- Delete Invoice
- Autogenerates Invoice Code
- Validates Invoice Code
- Error Trapping
System Snapshots
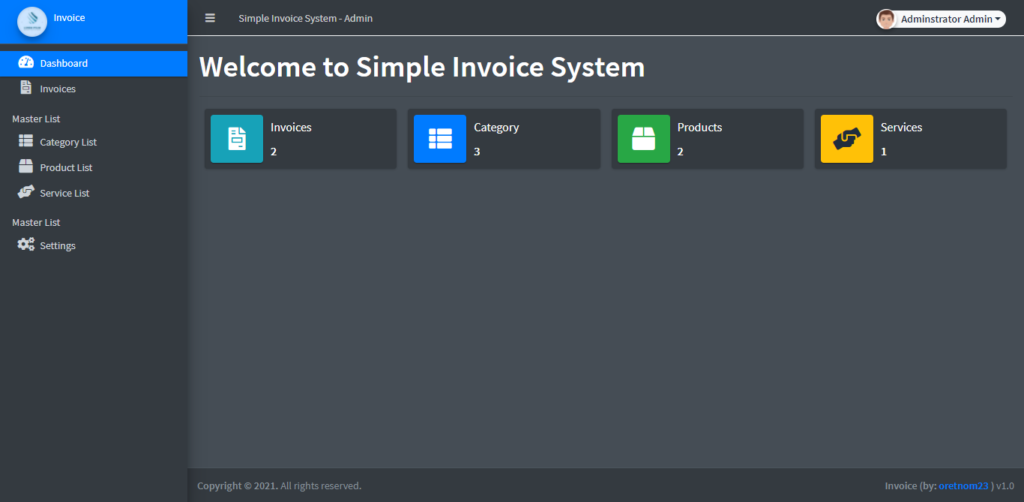
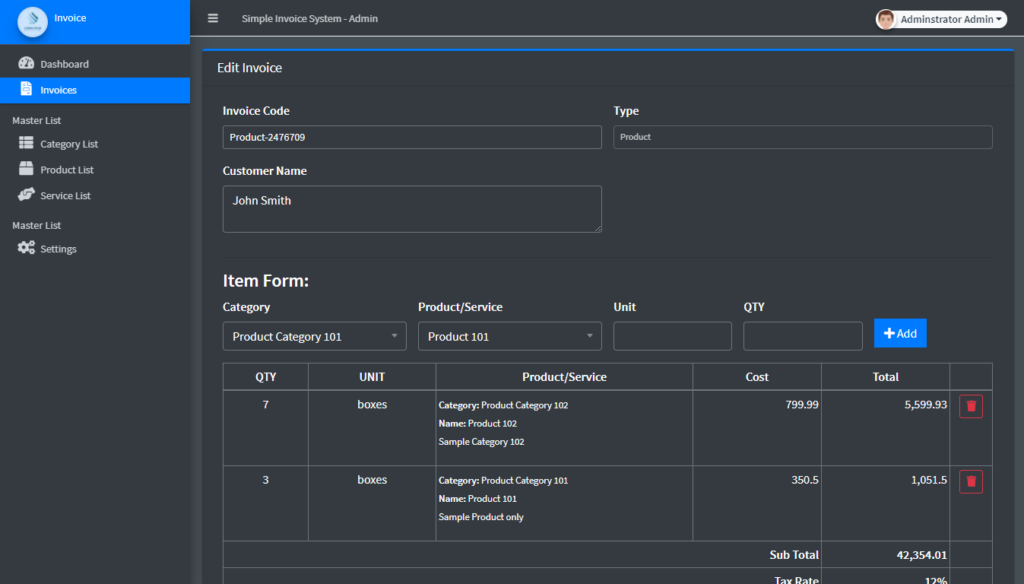
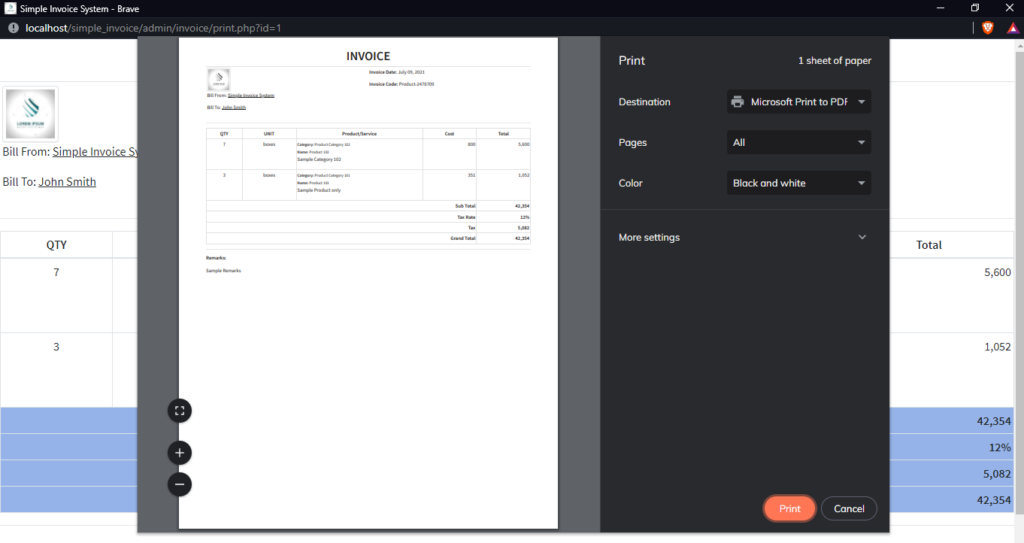
The source code is free to download on this website. Feel free to download and modify the source code the way you desire. This project was developed only for educational purposes only.
How to Run
Requirements
- Download and Install any local web server such as XAMPP/WAMP.
- Download the provided source code zip file. (download button is located below)
Installation/Setup
- Open your XAMPP/WAMP’s Control Panel and start the
ApacheandMySQL. - Extract the downloaded source code zip file.
- If you are using XAMPP, copy the extracted source code folder and paste it into the XAMPP’s “htdocs” directory. And If you are using WAMP, paste it into the “www” directory.
- Browse the
PHPMyAdminin a browser. i.e.http://localhost/phpmyadmin - Create a new database naming
invoice_db. - Import the provided
SQLfile. The file is known asinvoice_db.sqllocated inside the database folder. - Browse the Invoice System in a browser. i.e.
http://localhost/simple_invoice
Access Information:
Username: admin
Password: admin123
That’s it! I hope this Invoice System in PHP/OOP and MySQL Database that I have created will help you with what you are looking for and you’ll find something useful for your future projects.
Explore more on this website for more Free Source Codes and Tutorials.
Enjoy 🙂
Note: Due to the size or complexity of this submission, the author has submitted it as a .zip file to shorten your download time. After downloading it, you will need a program like Winzip to decompress it.
Virus note: All files are scanned once-a-day by apilogin.in for viruses, but new viruses come out every day, so no prevention program can catch 100% of them.
FOR YOUR OWN SAFETY, PLEASE:
1. Re-scan downloaded files using your personal virus checker before using it.
2. NEVER, EVER run compiled files (.exe’s, .ocx’s, .dll’s etc.)–only run source code.
Student Result Management system using PHP & MySQL
Student Result Management System using PHP & MySQL
Student Result Management system Project using PHp and MySQL is a web based application. Student Result Management Project stores the student detail and their student results.
SRMS Project Requirements
| Project Name | Student Result Management System |
|---|---|
| Language Used | PHP5.6, PHP7.x,PHP8.x |
| Database | MySQL 5.x,MySQL 8.x |
| User Interface Design | HTML, AJAX,JQUERY,JAVASCRIPT |
| Web Browser | Mozilla, Google Chrome, IE8, OPERA |
| Software | XAMPP / Wamp / Mamp/ Lamp (anyone) |
Student Result Management System divided in two modules:
- Student
- Admin
Admin Features
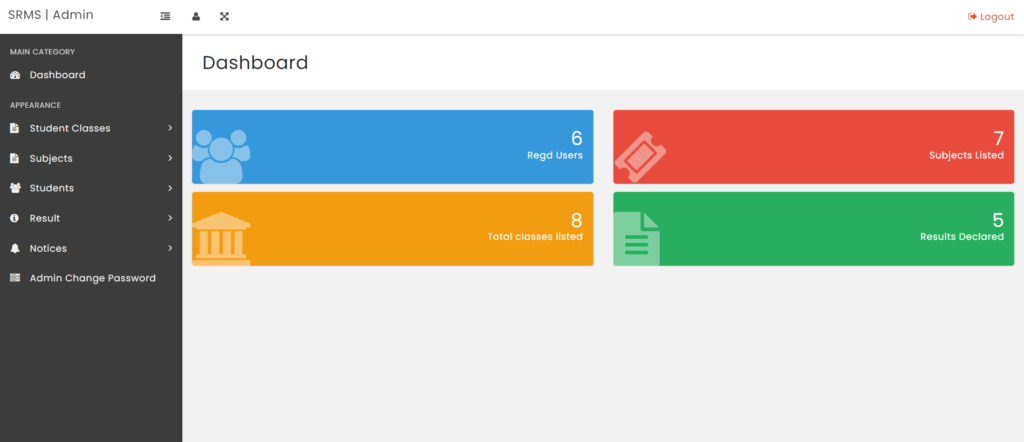
- Admin Dashboard
- Admin can add/update/delete Class
- Admin can add/update/delete Subjects
- Admin can add/update/ Active/Inactive Subject combination with class
- Admin can register new student and also edit info of the student
- admin can declare/ edit result of a student.
- Admin can add/ delete the notice.
- Admin can change own password
Students-
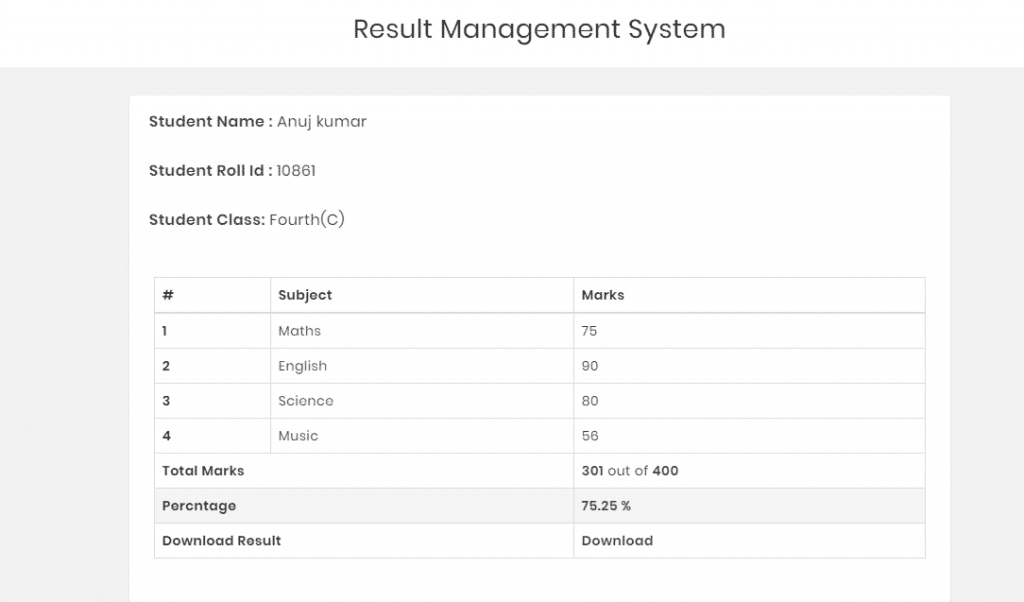
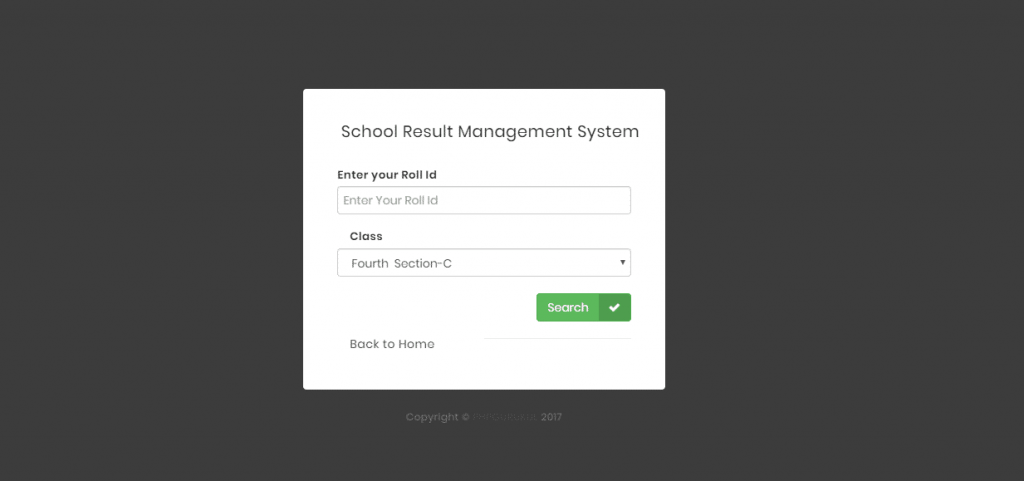
- Student can search their result using valid rollid.
- Student can also View the notices.
How to run the SRMS Project
1. Download and Unzip the file on your local system copy srms folder.
2. Put srms folder inside the root directory
Database Configuration
Open phpmyadmin
http://localhost/phpmyadmin
Create Database srms
Import database srms.sql (available inside the zip package)
For User
Open Your browser put inside browser http://localhost/srms
*********************Details of student**********************
Student name– Anuj Kumar
Roll id–10861
Student Class: Fourth(C)
********************For Admin Panel************************
Open Your browser put inside browser http://localhost/srms
Username : admin
Password : Test@123
Download full source code(Student Result Management system)

